

Your MacBook shows Storage Almost Full again. You just deleted 20GB of files yesterday. This happens to millions of Mac users every week. You clean out photos and old downloads, but that storage warning keeps coming back. The real problem? Something called System Data is eating your hard drive alive.
It grows like a monster in the background, often consuming 50-100GB or more of your precious space. Apple doesn’t make it easy to find these hidden storage hogs. But you don’t need to buy a new computer or live with constant warnings.
1. The Real Reason Your Mac Storage Disappears

You had 100GB free yesterday. Today you’re down to 20GB. You didn’t download anything big. So where did your storage go? Your Mac is eating storage in ways Apple doesn’t clearly explain.
Recent Apple Community posts show users facing massive System Data usage on 2024 MacBooks, with some reporting over 100GB taken up by this mysterious category. One 2024 MacBook Air user discovered System Data consuming over 100GB despite trying common cleanup solutions.
Time Machine Is Secretly Hoarding Your Space

Your Mac creates backup snapshots even when you’re not backing up. These local snapshots live on your main drive, not your backup drive. Time Machine typically stores hourly snapshots for the last 24 hours, plus a snapshot of your last successful backup.
These snapshots can eat 20-50GB without warning you. On APFS drives, snapshots can take up to 80% of your disk space. One user found 94GB of local snapshots cluttering their drive. Apple says these get deleted automatically when you need space. That doesn’t always work.
System Data Grows Like a Weed

Recent reports show users with System Data taking up 115GB, 137GB, and even 400GB on new Mac minis. That’s not normal. That’s broken. System Data includes everything that doesn’t fit other categories. Log files, caches, iOS backups from your iPhone and iPad, app support files, and temporary files all get dumped here. Over time, this digital junk drawer overflows.
App Caches Never Stop Growing

Every app creates cache files. Web browsers cache images and scripts. Photo editors cache thumbnails. Video apps cache preview files. These caches are supposed to speed things up, but they keep growing without limits.
MacOS should clean these automatically. It often doesn’t. Cache files can accumulate in locations like ~/Library/Caches and /Library/Caches without users knowing.
iOS Backups Hide in Plain Sight

Your iPhone and iPad backup to your Mac through iTunes or Finder. These backups are stored in /Users/YourUserName/Library/Application Support/MobileSync/Backup. Each device can create multi-gigabyte backups. You might have backups from old devices you forgot about. Or multiple backups from the same device. These stack up over months and years.
Purgeable Space That Won’t Purge

MacOS creates purgeable space that’s supposed to free up automatically when needed. However, many users report purgeable space that never actually gets purged. One user had 2.07TB of purgeable data that wouldn’t clear, preventing Final Cut Pro from importing files.
Another user saw 450GB of purgeable space on a 1TB drive that apps couldn’t access. Apple’s algorithm for deciding when to purge this space is broken. Users report 380GB usage that drops to 200GB after a simple restart on 2024 MacBook Pro cases.
Why This Happens Now More Than Ever
Modern Macs use APFS file system snapshots differently from older systems. The mechanism for storing local backups changed from HFS to APFS, creating new problems. iCloud syncing adds another layer of complexity with files that exist in multiple states.
Plus, apps create more cache data than ever. High-resolution displays, 4K videos, and complex apps all generate more temporary files.
The Quick Fix
Before you panic-delete important files, try restarting your Mac. A simple reboot often clears temporary files and resets disk space calculations. For Time Machine snapshots, temporarily turn off automatic backups in Time Machine settings, wait a few minutes, then turn them back on.
This forces macOS to delete local snapshots manually. Your Mac storage problems aren’t your fault. Apple’s storage management has real issues that affect daily users. But now you know where to look when your storage mysteriously disappears.
2. 5 Hidden Storage Killers Apple Doesn’t Show You

Your Mac says you’re out of space. Again. You delete photos and apps, but nothing changes. What’s eating your storage? Apple hides the real storage hogs from you. These hidden files Mac users never see can steal hundreds of gigabytes. Here’s where to find them and get your space back.
Time Machine Local Snapshots Eat 50GB+

Time Machine snapshots are the biggest storage thief. Your Mac saves local copies of everything, even when you’re not backing up to an external drive. These Time Machine snapshots can grab 50GB or more.
You won’t see them in Finder or Storage settings. Check yours with this command in Terminal: tmutil listlocalsnapshotdates. See dates listed? Each one is a snapshot taking up space. Delete old ones to free up room fast.
iOS Backups Mac Users Forget About

Your iPhone and iPad backups live on your Mac. One user found 223GB of iOS backups Mac was storing without telling him. Find yours here: ~/Library/Application Support/MobileSync/Backup.
These folders have random names, but each one is a device backup. Delete backups from old devices you don’t own anymore. Keep recent ones for devices you still use.
Application Support Files You Can’t See

Apps store data in hidden folders. Some apps leave huge files behind even after you delete them. Check: ~/Library/Application Support. Look for folders from apps or other files that never get cleaned up. These caches grow bigger over time.
Safari cache: ~/Library/Caches/com.apple.Safari Chrome cache: ~/Library/Caches/Google/Chrome Some cache folders hit 10GB or more. Empty them to get quick storage wins.
Forgotten dmg Files in Downloads
Those installer files add up fast. Every app you install leaves a .dmg file in Downloads. Check your Downloads folder for:
- .dmg installer files
- .zip archives
- Old software you downloaded but never used
You can safely delete these after installing the apps.
Get Your Space Back Today

Start with Time Machine snapshots they’re usually the biggest problem. Then check iOS backups and clear out old caches. These hidden files Mac doesn’t show you can free up 100GB or more.
Your Mac will run faster, and you’ll stop getting those annoying storage warnings. Don’t let Apple hide your storage problems from you. Take control and clean out these space stealing files today.
3. The 10-Minute Fix That Frees 50GB+ of Space

Your Mac is full again. You need space now, not later. You can free up 50GB or more in just 10 minutes. No fancy software needed. These Mac cleanup steps work on any Mac and cost nothing. Here’s exactly how to do it.
Step 1: Delete Time Machine Snapshots

Time Machine snapshots are huge space wasters. They can eat 30-50GB without you knowing. Delete them with Terminal:
- Open Terminal (press Command + Space, type “Terminal”)
- Type:
tmutil listlocalsnapshotdates - Press Enter to see your snapshots
- Delete old ones with:
sudo tmutil deletelocalsnapshots date
Replace date with actual dates from step 2. Delete anything older than a week. Don’t delete snapshots from today. You might need them if something goes wrong. This step alone can free 20-50GB in two minutes.
Step 2: Remove Old iOS Backups

Your iPhone and iPad backups pile up fast. Most people have backups from devices they sold years ago. How to delete Time Machine snapshots and old backups:
- Click Apple menu > System Settings
- Click General in the sidebar
- Click Storage Settings
- Find “iOS Files” or “Device Backups”
- Delete backups from old devices you don’t own
- Keep only recent backups from current devices
You might see backups labeled with device names like John’s iPhone from 2019. Delete those. This can clear 10-30GB, depending on how many old devices you backed up.
Step 3: Clear Application Caches
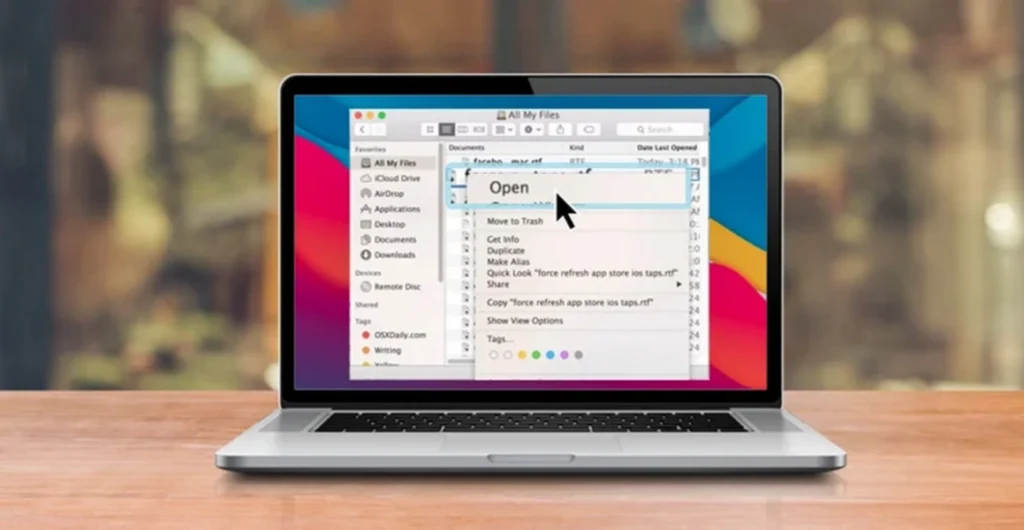
Apps save temporary files that never get cleaned up. Browser caches are the worst offenders. Manual method:
- Open Finder
- Press Command + Shift + G
- Type:
~/Library/Caches - Look for large folders (over 1GB)
- Delete contents of Safari, Chrome, and other browser cache folders
Built-in method:
- Hold the Option key and click Apple menu
- Click System Information
- Click the Storage tab
- Click “Recommendations”
- Click “Reduce Clutter”
The manual method works faster for browser caches. Chrome cache alone can be 5-10GB. Don’t delete system cache folders anything with “com.apple.system” in the name.
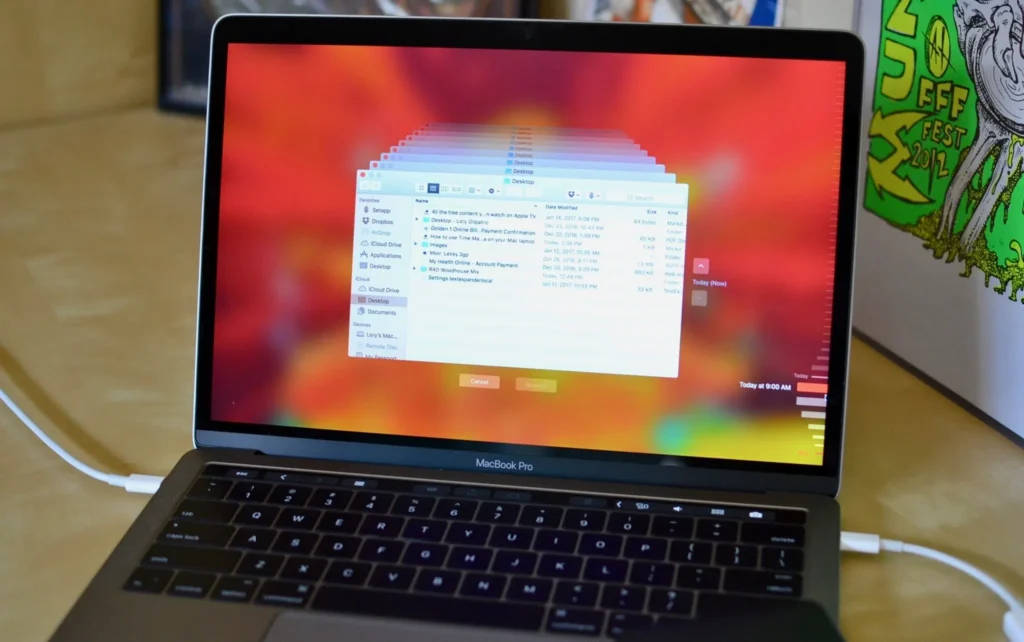
Step 4: Empty Hidden Downloads

Your Downloads folder hides large files you may have forgotten about. Clean it out:
- Open the Downloads folder
- Sort by size View menu > Sort by > Size
- Delete large .dmg installer files
- Remove old .zip files and software installers
- Clear out videos and large documents you don’t need
Look for installer files from apps you already installed. You don’t need Adobe Creative Suite.dmg after installing Photoshop. This step usually frees 2-10GB of easy wins.
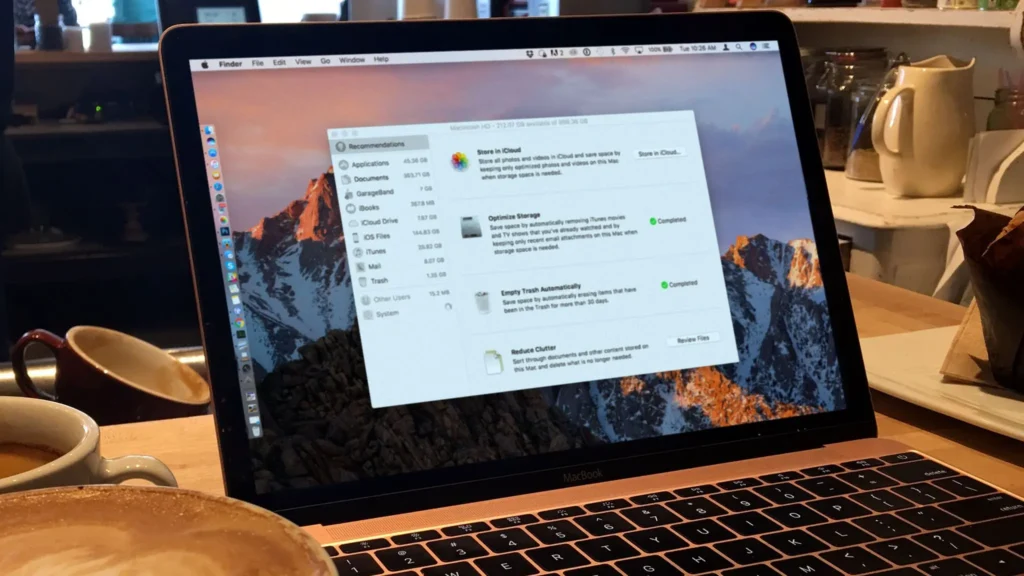
Step 5: Use Built-in Optimize Storage

Apple built storage tools right into your Mac. Use them.
Turn on automatic cleanup:
- Apple menu > About This Mac > More Info
- Click Storage Settings
- Click Recommendations
- Turn on Store in iCloud for photos and files
- Turn on Empty Trash Automatically
- Click Reduce Clutter to find large files
The Reduce Clutter tool shows your biggest files sorted by size. Delete movies, old downloads, and files you don’t need.
Your Mac Will Thank You

These Mac cleanup steps work every time. Start with Time Machine snapshots they give you the biggest space boost fastest. Don’t skip the cache clearing. Browser caches grow huge over time and slow down your Mac.
Run through all five steps now. Your Mac will have more space and run faster. The whole process takes 10 minutes, but saves you from buying more storage. Do this cleanup once a month to keep your Mac running smoothly.
4. The Best Tools for Mac Storage Cleanup in 2025

Your Mac is running out of space again. You can’t download new apps or save photos. Your computer feels slow. Sound familiar? You need the right Mac cleaner apps 2025 to fix this problem. Here’s what actually works.
Free Mac Cleanup Tools That Don’t Suck

Apple’s Built in Storage Management comes free with your Mac. Go to Apple Menu, About This Mac, Storage Settings. It shows you what’s eating your space. You can delete old iOS backups and clear your trash. It’s basic but safe. OnyX is the power user’s choice.
This free tool cleans system files and runs maintenance scripts. But the catch you need to know what you’re doing. One wrong setting can mess up your system. CCleaner works on Mac too. It cleans browser data and temporary files. The free version does enough for most people.
Paid Solutions Worth Your Money

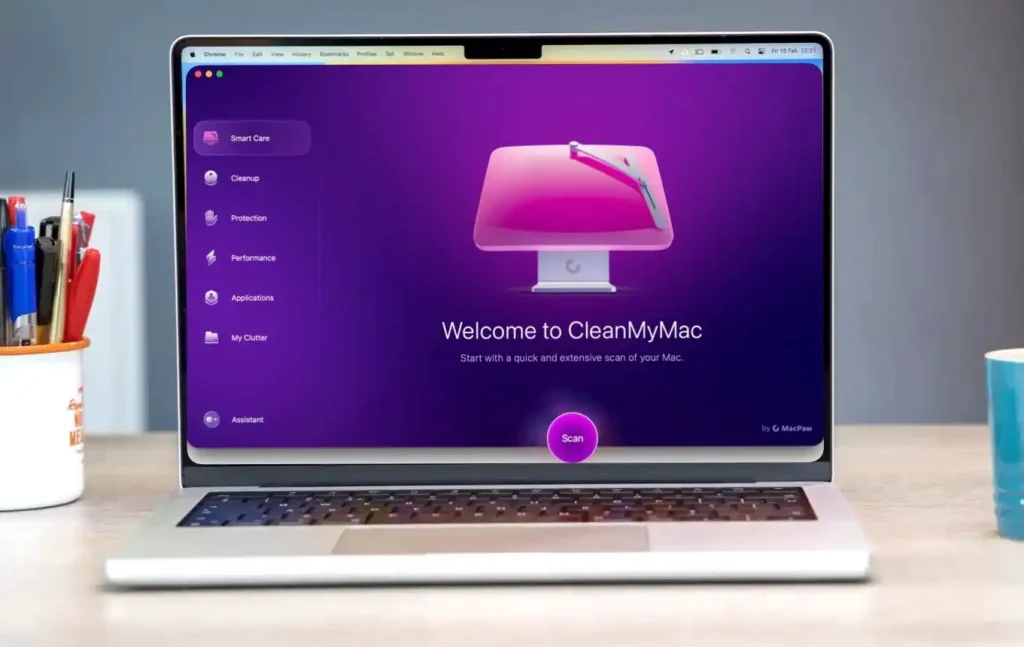
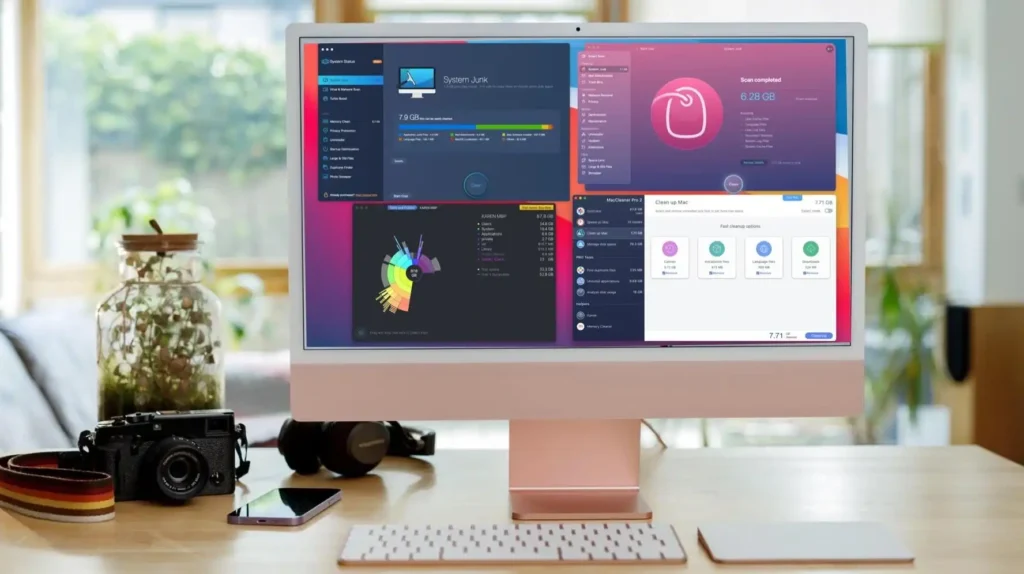
CleanMyMac costs $34.95 per year. It’s the easiest option. One click removes gigabytes of junk files. The app finds duplicate photos, old downloads, and system trash. It also blocks malware. The downside? That yearly fee adds up.
DaisyDisk costs $11.99 once. No subscription. This tool shows your storage as colorful rings. You can see exactly where your space went. It’s like having X-ray vision for your hard drive. You pick what to delete. Some people prefer this control.
CleanMyMac vs DaisyDisk: Which Wins?

CleanMyMac works automatically. You don’t need to think. DaisyDisk makes you choose what to remove. Choose CleanMyMac if you want something simple. Choose DaisyDisk if you want control and hate subscriptions. Both tools are safe. They won’t delete important system files.
Safety First: What to Avoid
Some free Mac cleanup tools are dangerous. They delete files your Mac needs. Stick to the tools mentioned here. Never use cleaning apps from pop-up ads. These are usually malware disguised as helpers. Always back up your Mac before using any cleaning tool. Even safe tools can make mistakes.
Which Tool Should You Pick?
Start with Apple’s built-in tools. They’re free and safe. If you need more power, try DaisyDisk for its one-time price. Choose CleanMyMac if you want automated cleaning and don’t mind paying yearly. Your Mac will thank you. So will your productivity. The best free Mac cleanup starts with what Apple gives you. But paid tools clean deeper and safer.
5. Advanced Fixes for Stubborn Storage Issues

Basic cleanup didn’t work. Your Mac still shows disk full warnings. You’ve deleted everything you can think of, but mysterious files keep eating your space. Time for the heavy-duty fixes. These advanced Mac cleanup methods target hidden system files that regular cleanup misses.
Delete Hidden APFS Snapshots

Your Mac secretly creates snapshots of your entire system. These can take up 20GB or more without showing up in normal storage calculations. Open Terminal and type: tmutil listlocalsnapshots /
You’ll see a list of snapshot dates. To delete old ones, type: tmutil deletelocalsnapshots 2024-01-15 (replace with actual dates from your list). This frees up space immediately. But be careful only delete snapshots older than a week. Recent ones protect you if something breaks.
Rebuild Your Spotlight Index

Spotlight creates an index of every file on your Mac. Sometimes this index gets corrupted and grows huge. A broken index can waste 10GB or more. Go to System Settings > Siri & Spotlight > Spotlight Privacy.
Add your entire hard drive to the privacy list. Wait 10 minutes, then remove it. Spotlight will rebuild its index from scratch. This takes a few hours but often frees up significant space.
Clean System Log Files

System logs track everything your Mac does. Over time, these files pile up in hidden folders. They’re safe to delete but require admin access. Open Terminal and run: sudo periodic daily weekly monthly
This command runs Mac system maintenance scripts that clean old log files. You’ll need to enter your password. The process removes logs older than your system’s retention settings. For manual cleanup, check /private/var/log But only delete files clearly marked as old logs.
Reset SMC and NVRAM

Sometimes storage problems come from corrupted system settings. Resetting your Mac’s hardware controllers can fix weird space issues. For SMC reset: Shut down your Mac. Hold Shift-Control-Option on the left side plus the power button for 10 seconds.
Release everything and restart. For NVRAM reset: Restart and immediately hold Option-Command-P-R until you hear the startup sound twice. These resets clear corrupt system data that might be causing false storage readings.
When to Do a Clean macOS Install

If nothing else works, you might need a fresh start. Back up your important files first. Then use Recovery Mode to erase your drive and reinstall macOS. This nuclear option fixes problems that advanced Mac cleanup can’t touch.
You’ll lose installed apps but gain a completely clean system. Plan for a full day to reinstall everything. But you’ll have maximum free space and better performance. ations.
6. How to Prevent Mac Storage Issues Forever

Your Mac keeps running out of space. Files disappear. Apps crash. You delete photos just to update your system. This cycle ends today. How to stop Mac storage problems before they start.
Set Up Weekly Automated Cleanup

Your Mac needs regular maintenance just like your car. Set a weekly reminder to empty your Trash and Downloads folders. These two spots eat up gigabytes without you noticing. Go to System Settings > General > Storage and click Optimize next to each category. This runs automatic cleanup tools that remove old files you don’t need.
Configure Time Machine the Right Way
Time Machine saves your life when things go wrong. But it also prevents storage disasters. Get an external drive that’s twice your Mac’s storage size. This gives Time Machine room to work properly.
Connect your external drive and turn on Time Machine. It backs up everything automatically. When your main drive fills up, you can restore old files from the backup instead of losing them forever.
Master iCloud Optimization Settings
iCloud can free up massive amounts of space if you set it up right. Go to Apple Menu > System Settings > Apple ID > iCloud. Turn on “Optimize Mac Storage” for Photos, Documents, and Desktop. This keeps recent files on your Mac but moves older ones to the cloud.
You can still access everything, but it doesn’t take up local space. Set iCloud to automatically delete old messages after one year. Text threads with photos and videos grow huge over time.
Monitor Your Mac Monthly

Open Activity Monitor once a month. Click the Disk tab to see which apps use the most storage. If something looks weird, you can catch problems early. Check your storage breakdown in System Settings > General > Storage. Look for apps that have suddenly grown large. These often have corrupted files or cache problems.
Choose Apps Wisely

Some apps bloat your system with unnecessary files. Avoid apps that promise to boost performance or clean your Mac automatically. Many create more problems than they solve. Before installing new software, check reviews for complaints about storage.
Some video editing apps and games can eat 50GB or more. This prevents the Mac from becoming full. The approach takes 30 minutes to set up. After that, your Mac maintenance schedule runs itself. No more surprise storage warnings.
